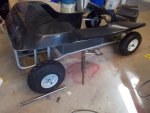
Okay, I want to build a go kart for my kid, as described in my intro post:
http://www.diygokarts.com/vb/showthread.php?t=40101
I am hoping to get it done by Christmas, though if not her birthday is in March. Anyway, I figure I might as well enter the build off then! So here is my entry. Please let me know if I did/do anything wrong.
Her nickname around the house is Sweet Pea, so we'll call it "Sweet Pea's Buggy" for now.
•MERGED•
First thing I've been working on is planning, and figuring out what length of axle to order as described in this thread:
http://www.diygokarts.com/vb/showthread.php?p=509613
Hopefully sub-threading is allowed because I figure if I have specific questions I'll post those as threads in the topic forums, then update progress on the build here. That should let people click down if they are interested.
Best,
Buggsy
•MERGED•
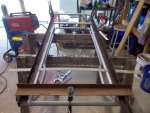
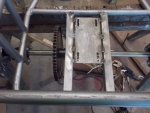
Well, I ordered all the "make it go" parts for the rear.
I went with Go Power Sports. They had the kit with all the components that I liked, another mini-kit that included chain and the clutch for the motor, free shipping, and the 10% forum member discount. All together the total is just over $260, and that ain't bad.
10T,#41, 3/4" bore, Centrifugal Clutch and Chain Kit $37.95 USD
Live Axle Kit - Complete 38" Axle -
(Add Axle Bearing Kit: 4 - 3 hole flanges & 2 hanger plates for [$13.95]) KDLAKIT 1 $252.95 USD
Subtotal: $290.90 USD
Coupon Code (DIYGOKARTS): -$29.10 USD
Shipping: $0.00 USD
Grand Total: $261.80 USD
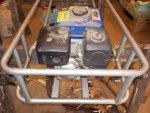
I already have a cheap 6.5hp Honda clone motor from harbor freight that I intend to use.
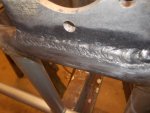
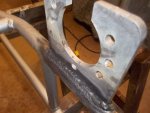
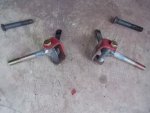
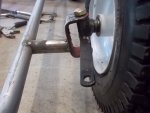
I was planning to use the front spindles from the donor Manco kart but they are only 3.5" in length total. Most of the standard wheel sizes they sell need at least a 4.5" spindle... so that's out.
So I'll have to decide if I want to re-use the Manco front wheels (I really don't since they won't look in the same style as the rears) or start looking around for either front wheels that will fit or new wheel/spindle combos.
Best,
Buggsy
http://www.diygokarts.com/vb/showthread.php?t=40101
I am hoping to get it done by Christmas, though if not her birthday is in March. Anyway, I figure I might as well enter the build off then! So here is my entry. Please let me know if I did/do anything wrong.
Her nickname around the house is Sweet Pea, so we'll call it "Sweet Pea's Buggy" for now.
•MERGED•
First thing I've been working on is planning, and figuring out what length of axle to order as described in this thread:
http://www.diygokarts.com/vb/showthread.php?p=509613
Hopefully sub-threading is allowed because I figure if I have specific questions I'll post those as threads in the topic forums, then update progress on the build here. That should let people click down if they are interested.
Best,
Buggsy
•MERGED•
Well, I ordered all the "make it go" parts for the rear.
I went with Go Power Sports. They had the kit with all the components that I liked, another mini-kit that included chain and the clutch for the motor, free shipping, and the 10% forum member discount. All together the total is just over $260, and that ain't bad.
10T,#41, 3/4" bore, Centrifugal Clutch and Chain Kit $37.95 USD
Live Axle Kit - Complete 38" Axle -
(Add Axle Bearing Kit: 4 - 3 hole flanges & 2 hanger plates for [$13.95]) KDLAKIT 1 $252.95 USD
Subtotal: $290.90 USD
Coupon Code (DIYGOKARTS): -$29.10 USD
Shipping: $0.00 USD
Grand Total: $261.80 USD
I already have a cheap 6.5hp Honda clone motor from harbor freight that I intend to use.
I was planning to use the front spindles from the donor Manco kart but they are only 3.5" in length total. Most of the standard wheel sizes they sell need at least a 4.5" spindle... so that's out.
So I'll have to decide if I want to re-use the Manco front wheels (I really don't since they won't look in the same style as the rears) or start looking around for either front wheels that will fit or new wheel/spindle combos.
Best,
Buggsy
Attachments
-
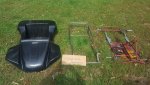 2018_buildoff_entry.jpg684.9 KB · Views: 9
Last edited by a moderator: