First build, Grand Daddy

MTScott

Active member
Messages
146
Reaction score
128
Location
Montana
This started with with a youtube video, and me carelessly stating "hey son, look at this go kart buggy thing this guy built, I bet we could build that..."

Fast forward a year and a 9 year old doesn't forget. It turned into "Dad, I thought you said we were building a go kart"

So, in order to not be "that dad", I'm building a grand daddy for my 9 year old (okay, it is a bit for me too... maybe more than a bit).

The Grand Daddy plans showed good promise, but.... after getting part way through them I've learned that one should plan on mods, and planning on adapting. It is funny how intricate some of the cuts and details are, yet some parts are "just make this one fit".

Either way, it was a good start. I originally built the base exact to plans, but after placing the seats in and seeing how I would fit (which was not at all), I opted to stretch it 6". I'm 5'11", with an appropriate beer gut, but I'm just built thick at 250. It would have fit my son fine, but only with the seats all the way back. At 9 he is 4'10", and the doc says statistically he'll be 6'2". I'd like this to last him well into his teen years.

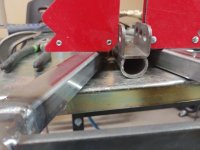
I knew I already had the the rest of the corners joints set perfect for a very square frame, and I didn't want to mess that up, so rather than remove the long side rails, I cut and spliced the frame with 6" lengths. I telescoped a piece of 1" on each side, then plug welded it on the outside and bottom, and also added a piece of 3/4" angle on the inside which will make a nice spot to secure the floor when added.
0210220826_copy_1164x873.jpg

I've purchased just about everything needed... most of the weldments, axle, hubs (i went with 3/4" shaft hubs, with tapered bearings), front shocks, engine, etc... many of the parts came from BMI carts. I'm in way more money than I expected, so, to anyone considering this kind of a thing for the first time - it isn't cheap, but it is fun.

I also ended up extending the rear uprights behind the seat 1.5". The original uprights in the plans are 14", so now they are 15.5". The lower rear bar limited how far back the seats could adjust, and I wanted all of the range out that I could get. Also, rough measurements of the predator 420 showed the "jog" (intended to clear the fuel tank) might still hit the tank.
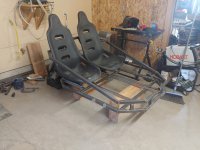
0221221633_copy_1164x873.jpg

Hopefully the angle of that picture doesn't show my more terrible welds.

Running adapters to fit the yamaha bolt patter rims up front (4x156)
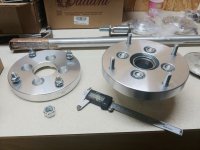
0217221539a_copy_1164x873.jpg

21x7-10 tires up front, 20x10-10 rear.
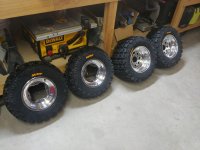
0217221539_copy_1164x873.jpg
 
Last edited:

MTScott

Active member
Messages
146
Reaction score
128
Location
Montana
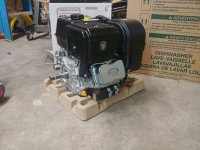
I ended up getting the predator 420 on sale for $370. I didn't know it at the time, but it turns out I have the (I guess) more desirable "hemi" head.

It seems the thing to do with this first, is remove the governor. I suspect there is debate there, but I think the gov was designed more to run a log splitter than a buggy, and I think the rev limiter is simply, well, limiting. I'll probably do the usual mods while I'm doing that, such as removing the oil sensor. Also likely a custom muffler, intake filter, and appropriate jetting. I may not do all this right away, but it seems that doing the governor and oil sensor is a lot easier on a brand new engine, but I dunno... maybe I should see how fast this goes as is before putting my kid in it.

49657.jpeg
 

Denny

Canned Monster
Messages
8,558
Reaction score
4,801
Location
Mayberry, Indiana
Start it and break in the engine first to make sure it is ok before tearing it apart and modifying it. It should be good for about 40 mph before any mods.
 

MTScott

Active member
Messages
146
Reaction score
128
Location
Montana
Start it and break in the engine first to make sure it is ok before tearing it apart and modifying it. It should be good for about 40 mph before any mods.
Sage advice... most likely what I'll end up doing as I'll be eager to see it roll anyway.
 

madprofessor

"Loose Cannon Creations"
Messages
2,899
Reaction score
889
Location
Jacksonville, Florida
Can't warranty the motor if you do mods to it like removing parts, you'd have to put it back to OEM setup before trying to exchange it or get repairs done. So it's a very good idea to break it in as is, until it's safe to wring it out. If all is good then, and you still want more top end, then you can remove the governor.
Remember that the governor delete only gives you more top end speed, doesn't increase your power overall.
Personally, if doing that, first thing I'd do is put in a billet rod and flywheel. The governor delete would be all the way, complete removal of all the internal components, not just the linkage on the outside. Been there done that on just the outside parts, got a homemade grenade.
 

MTScott

Active member
Messages
146
Reaction score
128
Location
Montana
Can't warranty the motor if you do mods to it like removing parts, you'd have to put it back to OEM setup before trying to exchange it or get repairs done. So it's a very good idea to break it in as is, until it's safe to wring it out. If all is good then, and you still want more top end, then you can remove the governor.
Remember that the governor delete only gives you more top end speed, doesn't increase your power overall.
Personally, if doing that, first thing I'd do is put in a billet rod and flywheel. The governor delete would be all the way, complete removal of all the internal components, not just the linkage on the outside. Been there done that on just the outside parts, got a homemade grenade.

Okay, good to know. I guess I'll start by just hooking up the throttle with governor in place, and see how it runs.

one thing I DO want to add is a second charging coil and voltage regulator to keep the start battery charged, I'm assuming I can get away with doing that.
 

madprofessor

"Loose Cannon Creations"
Messages
2,899
Reaction score
889
Location
Jacksonville, Florida
one thing I DO want to add is a second charging coil and voltage regulator to keep the start battery charged, I'm assuming I can get away with doing that.
I know flywheels with multiple magnets for multiple coils can be found, and YouTube has videos of people changing them out. Thing is that I've looked for a flywheel like that in a test-certified billet and never found one.
I've seriously seen too many horrible scenes of engine destruction to not fear the explosion of a cast iron factory or replacement flywheel being over-revved. If it's turning over 100 revolutions every second (6K rpm) and the iron shatters, it breaks like a glass thrown against a wall. Big chunks of iron moving half the speed of sound can go right through the pathetically weak flesh and bones of a human being like poop through a goose. I really want that 17K rpm certified billet, and I'd be willing to plug into a charger at the end of every ride to have it.
 

Functional Artist

Well-known member
Messages
4,420
Reaction score
1,705
Location
Toledo, Ohio
I know flywheels with multiple magnets for multiple coils can be found, and YouTube has videos of people changing them out. Thing is that I've looked for a flywheel like that in a test-certified billet and never found one.
I've seriously seen too many horrible scenes of engine destruction to not fear the explosion of a cast iron factory or replacement flywheel being over-revved. If it's turning over 100 revolutions every second (6K rpm) and the iron shatters, it breaks like a glass thrown against a wall. Big chunks of iron moving half the speed of sound can go right through the pathetically weak flesh and bones of a human being like poop through a goose. I really want that 17K rpm certified billet, and I'd be willing to plug into a charger at the end of every ride to have it.

I'd be willing to plug into a charger at the end of every ride"
Um...yea...me too :devil2::innocent: :sifone:
 

MTScott

Active member
Messages
146
Reaction score
128
Location
Montana
I know flywheels with multiple magnets for multiple coils can be found, and YouTube has videos of people changing them out. Thing is that I've looked for a flywheel like that in a test-certified billet and never found one.
I've seriously seen too many horrible scenes of engine destruction to not fear the explosion of a cast iron factory or replacement flywheel being over-revved. If it's turning over 100 revolutions every second (6K rpm) and the iron shatters, it breaks like a glass thrown against a wall. Big chunks of iron moving half the speed of sound can go right through the pathetically weak flesh and bones of a human being like poop through a goose. I really want that 17K rpm certified billet, and I'd be willing to plug into a charger at the end of every ride to have it.
From what I understand, simply adding another coil will double the charge capacity with the existing flywheel/magnets... correct?

Even with that, I think you only get about 3 amps.

Can I feel safe about the stock flywheel? So you're saying there isn't a billet flywheel with the magnets to support more charging? Is upgrading the flywheel to billet a requirement if you remove the governor?

Phase two of this project will likely involve more electronics and lighting, and I'll probably add an alternator ultimately, to get the necessary power. This leans me even more towards just building a jackshaft setup that I can position indefinitely, as I'm thinking I'll try to rig the alternator to run off of the engine output shaft. I would think I could squeeze a V-belt in between the drive pulley and the engine.... or maybe I'll just put it on the end somehow... eh, I suppose that is down the road. I'd rather not delete my pull starter, as that is a nice backup to have.

Quick question, can anyone tell me the bore length of a 40 series driven pulley? I'm trying to plan out jackshaft length, sprockets, etc... don't have one in hand yet though.
 
Last edited:

madprofessor

"Loose Cannon Creations"
Messages
2,899
Reaction score
889
Location
Jacksonville, Florida
I'm trying to plan out jackshaft length, sprockets, etc...
You can just pick any length of keyed axle stock for your jackshaft that's convenient, like a 12" or other, and bolt it down with pillow block bearings in the position that will have the driven lined up dead center with the driver, close enough for a genuine Comet belt to reach. You can cut off any excess shaft length if you feel like it, but not necessary.
3/4" Keyed Shaft | 400134-** | BMI Karts And Parts
UCP204-12 Pillow Block Bearing 3/4" Bore 2 Bolt Solid Base (2PCS) (jeremywellindustry.com)
3/4" Bore Double Split Shaft Collar Black Oxide Set Screw Style (2 PCS) 799789046988 | eBay
..................here's how you measure for a Comet belt once the jackshaft and driven are mounted...............
Comet Drive Belts | Comet Torque Converter Belts | Go Kart Belts (gokartsupply.com)
 

MTScott

Active member
Messages
146
Reaction score
128
Location
Montana
I know flywheels with multiple magnets for multiple coils can be found, and YouTube has videos of people changing them out. Thing is that I've looked for a flywheel like that in a test-certified billet and never found one.
I've seriously seen too many horrible scenes of engine destruction to not fear the explosion of a cast iron factory or replacement flywheel being over-revved. If it's turning over 100 revolutions every second (6K rpm) and the iron shatters, it breaks like a glass thrown against a wall. Big chunks of iron moving half the speed of sound can go right through the pathetically weak flesh and bones of a human being like poop through a goose. I really want that 17K rpm certified billet, and I'd be willing to plug into a charger at the end of every ride to have it.

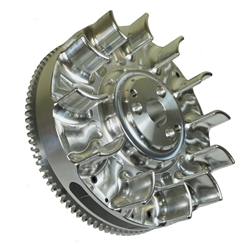
What about this guy:

??
 

madprofessor

"Loose Cannon Creations"
Messages
2,899
Reaction score
889
Location
Jacksonville, Florida
Good call on the ARC Racing billet flywheel you linked above. I just checked the ARC website about that UT1 coil with UT2 engine thing, trying to learn something. They've got a different one for the GX340 and GX390, but doesn't say it's for your Predator 420. It uses the UT2 stock coil w/built-in 4500rpm rev-limiter, but a UT2 non-rev limiting coil's needed if bypassing the rev limiter. Says also that it's not compatible with OEM charging systems. Oof, brain hurts now, not used to this charging stuff. ARC link below...............
6693-E GX390 UT2 Electric Start Billet Flywheel - ARC Racing
 

MTScott

Active member
Messages
146
Reaction score
128
Location
Montana
Good call on the ARC Racing billet flywheel you linked above. I just checked the ARC website about that UT1 coil with UT2 engine thing, trying to learn something. They've got a different one for the GX340 and GX390, but doesn't say it's for your Predator 420. It uses the UT2 stock coil w/built-in 4500rpm rev-limiter, but a UT2 non-rev limiting coil's needed if bypassing the rev limiter. Says also that it's not compatible with OEM charging systems. Oof, brain hurts now, not used to this charging stuff. ARC link below...............
6693-E GX390 UT2 Electric Start Billet Flywheel - ARC Racing

Yeah it gets deep pretty quick.

It's possible I misunderstood these fly wheels.... the UT1 vs UT2 only refer to the ignition coil. It seem the billet flywheels do not have charging magnets at all??

It would be nice to figure out how to retrofit an ignition based RPM rev limiter. to limit around 5K. I'd feel better about removing the governor then. Maybe down the road...

Red beards garage did an episode where they used a 4 coil charge setup out of a Lifan engine - bolted right into the predator. Then they used the rectifier/regulator out of the Lifan. It was supposed to 18A, IF they could use the lifan flywheel (4 magets), but the ignition was thrown way off because the key slot was in a different position than the stock predator. So, they switched back to the predator flywheel and estimated they were getting 8-9Amps. There appears to be a 4 coil honda setup, but they aren't cheap. I can't seem to find the Lifan stuff.
 
Last edited:

Denny

Canned Monster
Messages
8,558
Reaction score
4,801
Location
Mayberry, Indiana
Empty, I would just add an old GM alternator and drive it off of the fan side of the engine. The stock valve springs will limit rpm to under 5500 rpm if you do not make any other changes other than removing the governor.
 

MTScott

Active member
Messages
146
Reaction score
128
Location
Montana
Empty, I would just add an old GM alternator and drive it off of the fan side of the engine. The stock valve springs will limit rpm to under 5500 rpm if you do not make any other changes other than removing the governor.

Ha, valve float rev limiter eh? :). I guess chewing up a valve is better than exploding a flywheel and maming someone.
 

Denny

Canned Monster
Messages
8,558
Reaction score
4,801
Location
Mayberry, Indiana
Actually on here I don’t believe we have ever heard of that happening. When you hit valve float just back off a little bit.
 

MTScott

Active member
Messages
146
Reaction score
128
Location
Montana
Some updates. A-arms are done, installed, etc... I made a few changes from the plans.

I'm not master fabricator, so I have to come up with tricks to make it no-brainer. It doesn't often actually turn out that way, but I try.

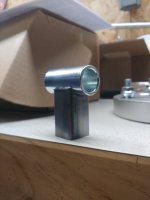
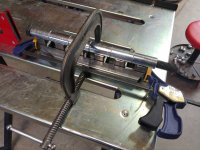
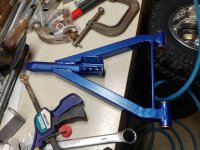
For the pivot points, I purchased these steel sleeve bearings from home depot.... I didn't really want them nickel plated, but it was the cheapest way to get seamless 1" OD, 3/4" ID tube without buying DOM tube. The reason for the exact (or near) 0.750" fit they perfectly fit bronze flange bearings, which you'll see down the road as well. They're pre-cut and fairly cost effective 10.88 for a pack of 5. As you can see, the fit of the short 2" piece is fairly clean, I'll post pics to show how I did that as well.0227221036_copy_873x1164.jpg


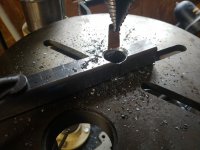
To get the 1" OD fit for the short 2" pieces I used a step bit to bore out either side, then cut down the middle. About 1/4" had to be removed for a clean fit. In the end I still had to a bit of grinding and rework to get them perfect. It was time consuming. I'm not sure I'd do it this way again.... but I'm not sure I'd do the A-arms at all like the plans next time anyway.


0227221015_copy_1164x873.jpg

Once I had all the pieces cut and ground, I used a 3/4" x 14" long bolt (acquired from fastenal, for only 10ish bucks), to line them all up before I tacked them together in order to get the same height. I also made some 1" spacers to help with centering them on the sleeve.


0305221236_copy_1164x873.jpg
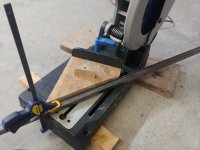
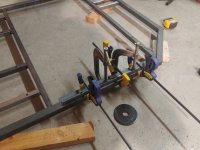
In order to get the necessary angle on the outside rails of the A-arm, I made a bit of a rudimentary jig for my evolution chop saw.... this turned to not be all that safe, but with enough clamping I got through it.

0305221019_copy_1164x873.jpg

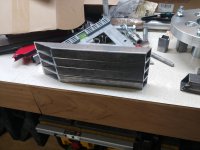
The angle didn't turn out exactly as the plans called for, so I just try to make it balance out, and make them all the same


0305221050_HDR_copy_1164x873.jpg
 

MTScott

Active member
Messages
146
Reaction score
128
Location
Montana
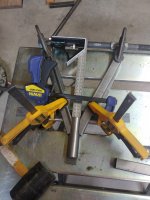
I had such nice weldments that came with my 5/8 hiem joints, it seemed a shame not to use them, so I opted to use 1.25" tube, .120 wall, which is what the rod end weldments called for. I had to do a bit more grinding and cutting, but once done, the outside edges for the 1" square tube settled nicely against the 1.25" tube. I used the same 3/4" bolt to run through the hinge points in order to keep them straight. After the first one was complete, I essentially used it as a jig. for the others. I ended up making a spacer out of 1" tube as well to bolt in between each sleeve.

0306220917_copy_873x1164.jpg

I cut a section out of the tube in the lower sleeve so I could settle the shock mount against it
0313221017_copy_1164x873.jpg

In the end, after finish welding, they still changed. All of the hinged/sleeve ends pulled in, just enough to be annoying. I'm learning some hard lessons about where to tack, what portion to weld first, etc. I ended up opening them up, and welding in 1/4" bar to hold them where they need to be.


0314221830_HDR_copy_1164x873.jpg

Take notice of the flanged bronze bushings. I got these from bronzebushings.com. Ended up about $3 a piece with shipping. Much cheaper than sourcing them local. Some pressed in by hand, but most of the time I had to use a c-clamp to seat them all the way. 5/8 ID, 3/4 OD, 1" flange.
 
Last edited:
Top