High Compression GX200 - Oil blowing out valve cover, gas blowing out the carb

busted_blocks

Active member
Messages
110
Reaction score
96
Location
Dongguan, China
Hi Everyone,

I'm a relatively new engine builder. Relatively means I've blown up 3 or 4 engines...

My current setup is:
GX200
Decked Block (0.8mm)
Flat top piston
GX160 Head (mildly ported, removed sharp edges and increased bowl size to match 27mm intake valve)
27mm intake
24mm exhaust
Stock Cam
Sheet metal head gasket
Upgraded Valve springs (2.5mm thick wire, let's say 26lb springs)
22mm Carb (PE22)
Cast Aluminum flywheel
Timing advanced an extra12 deg or so.

First time running this setup I had knocking, which I kept thinking was from the valves, and the block cracked. Replaced the block upgraded my gas, then had the connecting rod grenade. Big hole in that block. I think this was due to a used crank shaft with some wear which wore on the connecting rod and increased friction etc.. Replaced the block, piston, crank shaft, connecting rod and ran it again. This time connecting rod was OK but the intake lobe on the cam was beat to heck. Replaced the cam, again beat to heck on the intake lobe. Replaced the valve guides, valves and cam and seems to work OK. Put in some laps on the track (go-kart) maybe 30 minutes in short sessions. I get oil blowing from the valve cover and gas blown out the carb. I put an oil catch can, so that collects the oil, but it's still losing oil to the catch can. I also have gas blowing out the carb. I took apart the engine and cam is OK, connecting rod is OK, oil has no metal in it. I have 1 6mmID hose going from the governor arm hole to the valve cover.

I have a second engine with larger valves, but basically the same setup. I ran it for only 10 minutes or so but it's also blowing gas out the carb. PWK24 flatside carb. It runs awesome, it's a beast, but oil/gas issues seem like I'm missing something.

Any suggestions on things to check/try would be very much appreciated.
 

Attachments

  • PWK24 Engine.jpg
    PWK24 Engine.jpg
    1 MB · Views: 12
  • PE22 Carb.jpg
    PE22 Carb.jpg
    1.2 MB · Views: 13
  • GX200 connecting rod.jpg
    GX200 connecting rod.jpg
    2.6 MB · Views: 12

BrownStainRacing

Well-known member
Messages
1,366
Reaction score
1,353
@busted_blocks

Sounds like the piston smacked the head.

That'll happen when there is not enough piston to head clearance.

I've had them smack the head with .022" piston to head.

I shoot for .030" now and have no more problems.

These block, cranks, sidecovers, bearing journals, pistons, wrist pins will flex and move around with enough heat and rpm.

ARC and stock rods will stretch.

Your oil problem is too much crankcase pressure and the stock baffle (valve in the valve cover) can't keep up at higher rpm. It wasn't designed to handle that extra pressure from the higher rpm you are turning.

I use 2) 1 way check valves to control the crank case pressure.

If that gx160 head started out as a 14cc head, and you have opened it up to, say 15-16cc now, that's still alot of compression ratio, probably 12:1 or higher.

When CR gets that high in these small crankcase engines, that causes a ton of blowby passed the piston and rings, which builds even more crankcase pressure.

You shaved the deck .8mm (.031"), is the piston sticking outta the cylinder now???

Gx200 is usally around .010"-.020" in the hole, with the stock piston and rod.

If its sticking out now, thats even more CR.

Heres the 1 way check valves I use. There's never any oil in my catch cans, I don't even use catch cans any more. Jus keep em up high so pressure will get out and no oil can get that high.

Simple, ez, cheap


Here's the clearances and torq specs I use for all these single cylinder utility engines. 163cc-224cc.

Piston to cylinder clearance and ring end gaps will help control the crank case pressure.


Hope this helps, good luck. That's a very nice kart 👌
 
Last edited:

Rat

Well-known member
Messages
1,686
Reaction score
1,140
Location
SW Virginia
Dinged up cam love is a dead tell that either A) you have too much lift...
Or B) You have too little clearance.
The evidence says there is no boubts that your knock is the piston trying hammer the open valve through the head.
You most likely now have a bent valve on top of everything else you've broken.

The fuel blowback says your intake valve doesn't close (either at all or fully)

Mechanics Golden Rule: ONE upgrade at a time makes easier faster diagnostics leading to a resolution before damages are irreversible requiring replacement.

9 times out of 10 if there's any inappropriate contact in the top end you can feel the momentary lock up by pulling the cord with the plug removed... and the plug being removed will act as a crude loudspeaker and the smack will be a lot easier to hear.

I followed @BrownStainRacing 's advice despite not blowing oil out if the head anymore and did a double check valve on the breather line and stuck a valve cover filter on the end of the tube I used running across the top of the flywheel shroud pinned in place with some clips to each of the top 2 shroud bolts. Recently smashed the reed plate out with a punch so I didn't have to listen to it flutter.
 

busted_blocks

Active member
Messages
110
Reaction score
96
Location
Dongguan, China
@busted_blocks

Sounds like the piston smacked the head.

That'll happen when there is not enough piston to head clearance.

I've had them smack the head with .022" piston to head.

I shoot for .030" now and have no more problems.

These block, cranks, sidecovers, bearing journals, pistons, wrist pins will flex and move around with enough heat and rpm.

ARC and stock rods will stretch.

Your oil problem is too much crankcase pressure and the stock baffle (valve in the valve cover) can't keep up at higher rpm. It wasn't designed to handle that extra pressure from the higher rpm you are turning.

I use 2) 1 way check valves to control the crank case pressure.

If that gx160 head started out as a 14cc head, and you have opened it up to, say 15-16cc now, that's still alot of compression ratio, probably 12:1 or higher.

When CR gets that high in these small crankcase engines, that causes a ton of blowby passed the piston and rings, which builds even more crankcase pressure.

You shaved the deck .8mm (.031"), is the piston sticking outta the cylinder now???

Gx200 is usally around .010"-.020" in the hole, with the stock piston and rod.

If its sticking out now, thats even more CR.

Heres the 1 way check valves I use. There's never any oil in my catch cans, I don't even use catch cans any more. Jus keep em up high so pressure will get out and no oil can get that high.

Simple, ez, cheap


Here's the clearances and torq specs I use for all these single cylinder utility engines. 163cc-224cc.

Piston to cylinder clearance and ring end gaps will help control the crank case pressure.


Hope this helps, good luck. That's a very nice kart 👌
Thanks so much for the detailed reply, and thanks for compliment about the kart. It's a ton of fun, more so when the engine is working :D

I'm a bit unsure of the exact setup for the one way valves for releasing the crank case pressure, do you have a picture you can share? I've already ordered some of those one way valves, so I'll be sure to implement that solution.

That's great info for the torque specs. I switched the head and side cover to use studs, but I did find my side cover came loose a few times. I have to regularly check those bolts.

The piston does not come past the block but it's zero clearance. The distance from head to piston is only the gasket. Considering all the places you said could stretch, I'm surprised I haven't had worse than just the valve hitting. I will use some modelling clay and make sure I have about 0.030".

Regarding the head volume, I have a newer style GX160 head, here they call them 168F for the 68mm 18CC heads and 170F for the 22CC GX200 clone heads. I measured the volume to be very close to 18CC. Also I'm working on 2 engines at the same time, so I will apply all this to both engines. The first has 27mm intake valve so I only had to machine the valve seat and bowl. The second is 30.5mm intake valve and I had to replace the valve seat. Most of the other specs are the same between the 2 engines. I attached a picture of the new valve seat. Picture is before and other head work was done, just machined the exhaust seat and pressed in the new intake seat.

I'll measure the clearance and put the engine back together tomorrow and let you know how it goes. Thanks again for the help.
 

Attachments

  • new valve seat.jpg
    new valve seat.jpg
    849.7 KB · Views: 3

busted_blocks

Active member
Messages
110
Reaction score
96
Location
Dongguan, China
Dinged up cam love is a dead tell that either A) you have too much lift...
Or B) You have too little clearance.
The evidence says there is no boubts that your knock is the piston trying hammer the open valve through the head.
You most likely now have a bent valve on top of everything else you've broken.

The fuel blowback says your intake valve doesn't close (either at all or fully)

Mechanics Golden Rule: ONE upgrade at a time makes easier faster diagnostics leading to a resolution before damages are irreversible requiring replacement.

9 times out of 10 if there's any inappropriate contact in the top end you can feel the momentary lock up by pulling the cord with the plug removed... and the plug being removed will act as a crude loudspeaker and the smack will be a lot easier to hear.

I followed @BrownStainRacing 's advice despite not blowing oil out if the head anymore and did a double check valve on the breather line and stuck a valve cover filter on the end of the tube I used running across the top of the flywheel shroud pinned in place with some clips to each of the top 2 shroud bolts. Recently smashed the reed plate out with a punch so I didn't have to listen to it flutter.
That makes perfect sense about the valves, I will measure it and make sure to have at least .030". I haven't decided if I'll machine the piston to clearance the valve or just use a thick head gasket.

You are 100% correct that changing one thing at a time is best. I have been progressively modifying the engine but once it was open, I did change a fair bit at once. New piston, larger intake valve and decked the block in 1 go. It's just so tempting to change a bunch at the same time when the engine is open and in the shop. I had more ambition than ability or experience. I'll learn to take things slower ;)

I don't feel any contact when pulling the cord but it must be super close and maybe hitting when running. I also don't see any marks on the piston which I thought I would. The explanation though is perfectly logical. I'll definitely proceed as if it's hitting. I've attached a pic of the block and head in case more can be learned from that. The block is as it was when taken apart, the head I've tried to lap a bit to make sure it's sealing properly since taking it apart. Not much, just a few passes with 320 grit on a granite block.

Thanks again for the help.
 

Attachments

  • block.jpg
    block.jpg
    2.5 MB · Views: 6
  • head.jpg
    head.jpg
    909 KB · Views: 6

BrownStainRacing

Well-known member
Messages
1,366
Reaction score
1,353
Thanks so much for the detailed reply, and thanks for compliment about the kart. It's a ton of fun, more so when the engine is working :D

I'm a bit unsure of the exact setup for the one way valves for releasing the crank case pressure, do you have a picture you can share? I've already ordered some of those one way valves, so I'll be sure to implement that solution.

That's great info for the torque specs. I switched the head and side cover to use studs, but I did find my side cover came loose a few times. I have to regularly check those bolts.

The piston does not come past the block but it's zero clearance. The distance from head to piston is only the gasket. Considering all the places you said could stretch, I'm surprised I haven't had worse than just the valve hitting. I will use some modelling clay and make sure I have about 0.030".

Regarding the head volume, I have a newer style GX160 head, here they call them 168F for the 68mm 18CC heads and 170F for the 22CC GX200 clone heads. I measured the volume to be very close to 18CC. Also I'm working on 2 engines at the same time, so I will apply all this to both engines. The first has 27mm intake valve so I only had to machine the valve seat and bowl. The second is 30.5mm intake valve and I had to replace the valve seat. Most of the other specs are the same between the 2 engines. I attached a picture of the new valve seat. Picture is before and other head work was done, just machined the exhaust seat and pressed in the new intake seat.

I'll measure the clearance and put the engine back together tomorrow and let you know how it goes. Thanks again for the help.
Yea, I get some pics for you.

There 3 reasons why the side cover bolts/ studs are coming loose.

Too much crankcase pressure from blowby, can't get the pressure out fast enough, and/or too much crankshaft end play.

Fix blowby, with piston to cylinder clearance and ring end gaps.

Fix too much pressure, with 1 way check valves.

Too much crank end play will turn that crankshaft into a sledge hammer every time you get on and off the throttle.

You keep hitting something with a hammer, long enough, and eventually something comes loose or breaks.

That side cover is the weakest part in the crankcase. Theres alot of flex and movement there. That crank hammering on it, surely dont help.

You would think a seal would blow 1st, but those side cover bolts loosen up 1st.

You fix crank end play, with side cover gasket thickness and/or crankshaft shims.

On your ring end gaps, set the 2nd ring end gap (from the top) .002"-.004" wider then the top ring.

You don't want too much pressure between the 1st and 2nd ring. It'll bounce around and flutter the top ring and won't have a good seal.

Since you have 3 vents or open ports (2 in valve cover, 1 in block), you can hook up a vacuum/ pressure gauge to the port in the block and see exactly what those check valves are doing.

Run the 2 check valves outta the valve cover ports, 1 in each port, furthest away from the valve cover you can get.

You gotta make sure every hose and fitting is completely sealed from the valve cover to the check valve.

If there's any leak in the system, it will pull air in every time the piston goes from the bottom of the cylinder to the top of the cylinder. And that defeats the purpose of the 1 way check valves, and causes more crankcase pressure.

Here's some old pics, I dont use the catch can any more. The bracket broke a few months back.

The vacuum/pressure gauge is still hooked up on my bike, it's not in the way, doesn't hurt any thing. I might take it off some day, but not today, 😆 😅 😂 🤣

I never see over 10psi crankcase pressure, it's turns 5900 rpm with a load on it. I built it in Sept 22', it has to have 120+ hrs on it by now.

If I remove 1 check valve outta line, the gauge goes passed 15 psi, remove both valves and it's maxed out20230604_162837.jpg and oil starts blowing out, under load.

I done alot of testing on that crankcase pressure. 1 way check valves, is the easiest, cheapest fix that I have found.

If you need more pics or help, jus lmk.

20230604_162854.jpg

20230604_164603.jpg
20230604_162831.jpg
 

Rat

Well-known member
Messages
1,686
Reaction score
1,140
Location
SW Virginia
Looking at your pics;
1. Based on the heavy soot you're running pig rich Considering the nearly no hours engine
2. You are correct in there being no contact marks, and there will be marks in the soot even if the tolerances are so tight the piston "kisses"

You do realize these things have a chatty loud valvetrain in general right?

The TC also tends to knock and chatter at idle as well... at least mine does
 

busted_blocks

Active member
Messages
110
Reaction score
96
Location
Dongguan, China
Looking at your pics;
1. Based on the heavy soot you're running pig rich Considering the nearly no hours engine
2. You are correct in there being no contact marks, and there will be marks in the soot even if the tolerances are so tight the piston "kisses"

You do realize these things have a chatty loud valvetrain in general right?

The TC also tends to knock and chatter at idle as well... at least mine does
I believe it's very rich, I haven't had a great amount of running time to tune the carb but I have an oxygen sensor + gauge arriving next week. I'll get that under control. I welded up an exhaust pipe for the sensor today. I also made one with springs. I had some cracking on my last exhaust, seeing if this helps.

The story goes like this:

Heard knocking, found a cracked crank case, opened the engine found evidence of detonation. Part was the cracked case, blown head gasket and I forget what else. I got high octane gas and rebuilt but had 3 connecting rods loosen or come apart. Very discouraging week. Now it's back together, I opened it after each 10 minutes of running, no connecting rod issues but the cam intake lobe was damaged twice. This is mostly where this thread started. Engine was running but blowing out lots of oil + gas.

I'm OK with noisy, just not with blowing out oil and obviously I need it to run more than 10 minutes at a time without having to replace something. Now I'm working to lower the case pressure as suggested by BrownStainRacing. The valve hitting is still a reasonable explanation for the damage on the cam and only on the intake lobe. It was starting to mushroom on the top and the head of the valve was damaged as well. I had to grind the top down to be able to get the valve out. So there are 2 explanations for the damaged cam. 1. valve hits 2. head was damaged with the original detonations and this damaged the cams. I already replaced the valve guides and valves so only thing left is ensure the clearance, which I think I did with 0.065" gasket instead of the 0.010" gasket. I still have to put the engine back together but I'm waiting for the one way valves I ordered to arrive. They will arrive tomorrow, so I should be back to testing on New Years.

Full disclosure, I only tack weld the exhaust and have a local welder do the bulk of the welding. I'm not much of a welder really.

Good point about the rich mixture and I'll make sure to address that ASAP
 

Attachments

  • pipe 2.jpg
    pipe 2.jpg
    2.2 MB · Views: 6
  • pipe1.jpg
    pipe1.jpg
    2.1 MB · Views: 6
  • pipe3.png
    pipe3.png
    1.1 MB · Views: 6

busted_blocks

Active member
Messages
110
Reaction score
96
Location
Dongguan, China
Yea, I get some pics for you.

There 3 reasons why the side cover bolts/ studs are coming loose.

Too much crankcase pressure from blowby, can't get the pressure out fast enough, and/or too much crankshaft end play.

Fix blowby, with piston to cylinder clearance and ring end gaps.

Fix too much pressure, with 1 way check valves.

Too much crank end play will turn that crankshaft into a sledge hammer every time you get on and off the throttle.

You keep hitting something with a hammer, long enough, and eventually something comes loose or breaks.

That side cover is the weakest part in the crankcase. Theres alot of flex and movement there. That crank hammering on it, surely dont help.

You would think a seal would blow 1st, but those side cover bolts loosen up 1st.

You fix crank end play, with side cover gasket thickness and/or crankshaft shims.

On your ring end gaps, set the 2nd ring end gap (from the top) .002"-.004" wider then the top ring.

You don't want too much pressure between the 1st and 2nd ring. It'll bounce around and flutter the top ring and won't have a good seal.

Since you have 3 vents or open ports (2 in valve cover, 1 in block), you can hook up a vacuum/ pressure gauge to the port in the block and see exactly what those check valves are doing.

Run the 2 check valves outta the valve cover ports, 1 in each port, furthest away from the valve cover you can get.

You gotta make sure every hose and fitting is completely sealed from the valve cover to the check valve.

If there's any leak in the system, it will pull air in every time the piston goes from the bottom of the cylinder to the top of the cylinder. And that defeats the purpose of the 1 way check valves, and causes more crankcase pressure.

Here's some old pics, I dont use the catch can any more. The bracket broke a few months back.

The vacuum/pressure gauge is still hooked up on my bike, it's not in the way, doesn't hurt any thing. I might take it off some day, but not today, 😆 😅 😂 🤣

I never see over 10psi crankcase pressure, it's turns 5900 rpm with a load on it. I built it in Sept 22', it has to have 120+ hrs on it by now.

If I remove 1 check valve outta line, the gauge goes passed 15 psi, remove both valves and it's maxed outView attachment 144375 and oil starts blowing out, under load.

I done alot of testing on that crankcase pressure. 1 way check valves, is the easiest, cheapest fix that I have found.

If you need more pics or help, jus lmk.

View attachment 144374

View attachment 144376
View attachment 144377
Thanks for the pics, I get it now. From the vavle cover, 1 tube is intake air with a one way valve and 1 tube is air/oil out through a one way valve to the catch can. I'll rig something similar up and try it. I'm very hopeful this will get my engine running reliably. It sure sounds like a big part of my issues are from too much crank case pressure. I'll also make sure to address any excess end play in the crank shaft. Oh and yes I will adjust the ring end gaps. I did set them very close to what you suggest on one engine, but the other one I just put the rings as they came from the shop. I'm sure that isn't helping. I can't recall which of the two engines has which rings. I picked up my second engine from the track today and will open it up tonight. It has the same blowing oil/gas issues so I'm planning on the same fix. If this works I'll have less need for a second engine to switch to when first one breaks :)

I do have a general question about stock parts. I have stock connecting rod and stock cam. Aftermarket cams are very hard to access here, as are CNC connecting rods. What kind of RPM do you think I can get with stock cam? Any guess what kind of timing I should be running? I think it's about 12 degrees right now. My RPM hits very close to 8000 with no load, on the track over 6000 but it's hard to drive and watch the gauge at the same time.

Thanks for all the detailed explanations, pictures and trouble shooting help. I was getting a bit discouraged there for a bit.
 

BrownStainRacing

Well-known member
Messages
1,366
Reaction score
1,353
@busted_blocks

Man, you do have alot going on with those engines.

We can get straighten out for you.

After the rebuild, break the engine in with the stock valve springs, valve lash set at .003" on both valves, have the carb set up for a lean condition, use a head gasket that is .045" to .052" thick, use the stock timing key.

As soon as the engines fires up, get rpm up above 2500 rpm asap.
Then use up and down throttle 2500-4500 rpm for the 1st 15 to 20 mins.

This will break the cam and lifters in, and seat the rings quicker.

I've wiped many cams out using heavy springs during break in, more stock cams then after market cams.

The lean carb, will help the rings seat during break in.

Too rich of a mixture during break in will wash the rings and never allow them to seat.

They will never hold pressure above the piston, and you will always have a ton of blow by.

A stock carb with the stock jetting, .016" low speed jet and .028" high speed jet works great for break in.

After I rebuid 1 of these clone ohv engines, it stays on the test stand for 3 or more days, gets 3 or more oil changes, (straight 30 weight oil), get ran at least 1 hr a day, recheck torq bolt specs on every cold cycle.

After you get 4,5, or 6 hrs on it, under load, then go back and change the head gasket, ignition timing, carb jetting, and whatever favorite flavor of oil you like. I use mobile1 10w30 full synthetic after break in.

Keep and eye on the spark plug while breaking in under load, you dont want it blistered white. It'll melt the ground strap off and destroy the engine.

I like to use a ngk bp8es or bp9es spark plug (cold) for lean jetting during break in.

If it's gonna break, I want it to break on the stand, not when I'm out 5 miles away and no cell service. 😂 😂 😂 😂 , that's not fun at all.

I'll look for a thread where I go into detail on how I break in an engine.

The 163cc and 196cc has alot more room for error in the crankcase, then the longer stroked engines.

You should check the rod, cam, crank clearances, as @Denny mentioned.

I've never seen or had any clearance problems with that 68mm bore block with the stock 54mm stroke crankshaft in any 196cc block. But it's always best to check.

I'd rather build the 163cc and 196cc engine jus because there's alot less time spent checking clearances.

As far as the stock rod and cam, I run em 6000 rpm in the 196cc with a pvl or ARC flywheel, 10.5:1CR, timing set 28-30*, a good tuned ruixin stock size carb, stock air box, short header with muffler.
Magnetic oil drain plugs and plenty of oil changes make em last forever.

But I also make sure the clearances are spec'ed for the whole build.

Stock cams works best with stock 10.8 lb springs with a installed height set at .840"-.850".
Dyno Cams makes the best 10.8 springs I've seen so far.

Too much spring will kill the power on the high side, and there's more of a chance to wipe out the lobes and lifters.

You should have plenty of clearance between the piston and valves.

Lay the head upside down, lay a straight edge across it and measure down to the edges of the valves. Find the smallest number.

Subtract the thickness of the straight edge, add the thickness of the head gasket ( you should be using at least a .030" thick gasket since your piston to deck is flush, .00000").

Multiply rocker ratio (stock is less then 1.1:1, but 1.1 is a good number to use) to the cam lift ( stock cams have .224" intake/.231" exhaust).

1.1 x .224 = .2464, that's not even a 1/4".

Subtract that number(.2464") from the head and straightedge number and you will see you have over .100" piston to valve clearance.

Do the exhaust the same way.

Your spark plug ground strap is closer to the piston.

There's other ways to measure it, but it's faster for me this way.

That surely looks like a 14cc head to me. I've used em alot on the 196 and 212's.

Stock 18cc heads are more round like the 20cc and 22cc head.

I'll round up pics for you.

Here's "break in" thread.

I'll find pics later.

Very nice job on that muffler, that looks awesome 👌

Post in thread 'Will this be worth it?' https://www.diygokarts.com/community/threads/will-this-be-worth-it.48132/post-606478
 

busted_blocks

Active member
Messages
110
Reaction score
96
Location
Dongguan, China
@busted_blocks

Man, you do have alot going on with those engines.

We can get straighten out for you.

After the rebuild, break the engine in with the stock valve springs, valve lash set at .003" on both valves, have the carb set up for a lean condition, use a head gasket that is .045" to .052" thick, use the stock timing key.

As soon as the engines fires up, get rpm up above 2500 rpm asap.
Then use up and down throttle 2500-4500 rpm for the 1st 15 to 20 mins.

This will break the cam and lifters in, and seat the rings quicker.

I've wiped many cams out using heavy springs during break in, more stock cams then after market cams.

The lean carb, will help the rings seat during break in.

Too rich of a mixture during break in will wash the rings and never allow them to seat.

They will never hold pressure above the piston, and you will always have a ton of blow by.

A stock carb with the stock jetting, .016" low speed jet and .028" high speed jet works great for break in.

After I rebuid 1 of these clone ohv engines, it stays on the test stand for 3 or more days, gets 3 or more oil changes, (straight 30 weight oil), get ran at least 1 hr a day, recheck torq bolt specs on every cold cycle.

After you get 4,5, or 6 hrs on it, under load, then go back and change the head gasket, ignition timing, carb jetting, and whatever favorite flavor of oil you like. I use mobile1 10w30 full synthetic after break in.

Keep and eye on the spark plug while breaking in under load, you dont want it blistered white. It'll melt the ground strap off and destroy the engine.

I like to use a ngk bp8es or bp9es spark plug (cold) for lean jetting during break in.

If it's gonna break, I want it to break on the stand, not when I'm out 5 miles away and no cell service. 😂 😂 😂 😂 , that's not fun at all.

I'll look for a thread where I go into detail on how I break in an engine.

The 163cc and 196cc has alot more room for error in the crankcase, then the longer stroked engines.

You should check the rod, cam, crank clearances, as @Denny mentioned.

I've never seen or had any clearance problems with that 68mm bore block with the stock 54mm stroke crankshaft in any 196cc block. But it's always best to check.

I'd rather build the 163cc and 196cc engine jus because there's alot less time spent checking clearances.

As far as the stock rod and cam, I run em 6000 rpm in the 196cc with a pvl or ARC flywheel, 10.5:1CR, timing set 28-30*, a good tuned ruixin stock size carb, stock air box, short header with muffler.
Magnetic oil drain plugs and plenty of oil changes make em last forever.

But I also make sure the clearances are spec'ed for the whole build.

Stock cams works best with stock 10.8 lb springs with a installed height set at .840"-.850".
Dyno Cams makes the best 10.8 springs I've seen so far.

Too much spring will kill the power on the high side, and there's more of a chance to wipe out the lobes and lifters.

You should have plenty of clearance between the piston and valves.

Lay the head upside down, lay a straight edge across it and measure down to the edges of the valves. Find the smallest number.

Subtract the thickness of the straight edge, add the thickness of the head gasket ( you should be using at least a .030" thick gasket since your piston to deck is flush, .00000").

Multiply rocker ratio (stock is less then 1.1:1, but 1.1 is a good number to use) to the cam lift ( stock cams have .224" intake/.231" exhaust).

1.1 x .224 = .2464, that's not even a 1/4".

Subtract that number(.2464") from the head and straightedge number and you will see you have over .100" piston to valve clearance.

Do the exhaust the same way.

Your spark plug ground strap is closer to the piston.

There's other ways to measure it, but it's faster for me this way.

That surely looks like a 14cc head to me. I've used em alot on the 196 and 212's.

Stock 18cc heads are more round like the 20cc and 22cc head.

I'll round up pics for you.

Here's "break in" thread.

I'll find pics later.

Very nice job on that muffler, that looks awesome 👌

Post in thread 'Will this be worth it?' https://www.diygokarts.com/community/threads/will-this-be-worth-it.48132/post-606478
Wow, that's an amazing amount of info, I'll go through it step by step. Can't thank you enough for taking the time to help me get this going.

Yes these engines are very ambitious for my experience level. It's not surprising they don't work properly. A few videos, a little reading and here I am. The good news is that parts are dirt cheap and I have a few tools lying around that are suitable for working on small engines. In hind sight, I think my biggest mistake was not asking for help sooner. I did start with just an upgraded carb but it really did spiral out of control.

It's funny you mention something happening far away from home with a faulty engine because on the go kart track, you can't be more than 600m from "home" so that hasn't been a big issue :ROFLMAO: Dumping a whole engine of oil on the track when the side cover came loose was a bit of an issue but I digress...

My job for the day will be to go through your list of things to do 1 by 1 and break in an engine. I'll read the post on break in as well and see where I get to tonight. I'll take a few pics and post back later.

Thanks for the kind words about the muffler. I'm trying to make as many parts as I can.
 

busted_blocks

Active member
Messages
110
Reaction score
96
Location
Dongguan, China
@busted_blocks

Man, you do have alot going on with those engines.

We can get straighten out for you.

After the rebuild, break the engine in with the stock valve springs, valve lash set at .003" on both valves, have the carb set up for a lean condition, use a head gasket that is .045" to .052" thick, use the stock timing key.

As soon as the engines fires up, get rpm up above 2500 rpm asap.
Then use up and down throttle 2500-4500 rpm for the 1st 15 to 20 mins.

This will break the cam and lifters in, and seat the rings quicker.

I've wiped many cams out using heavy springs during break in, more stock cams then after market cams.

The lean carb, will help the rings seat during break in.

Too rich of a mixture during break in will wash the rings and never allow them to seat.

They will never hold pressure above the piston, and you will always have a ton of blow by.

A stock carb with the stock jetting, .016" low speed jet and .028" high speed jet works great for break in.

After I rebuid 1 of these clone ohv engines, it stays on the test stand for 3 or more days, gets 3 or more oil changes, (straight 30 weight oil), get ran at least 1 hr a day, recheck torq bolt specs on every cold cycle.

After you get 4,5, or 6 hrs on it, under load, then go back and change the head gasket, ignition timing, carb jetting, and whatever favorite flavor of oil you like. I use mobile1 10w30 full synthetic after break in.

Keep and eye on the spark plug while breaking in under load, you dont want it blistered white. It'll melt the ground strap off and destroy the engine.

I like to use a ngk bp8es or bp9es spark plug (cold) for lean jetting during break in.

If it's gonna break, I want it to break on the stand, not when I'm out 5 miles away and no cell service. 😂 😂 😂 😂 , that's not fun at all.

I'll look for a thread where I go into detail on how I break in an engine.

The 163cc and 196cc has alot more room for error in the crankcase, then the longer stroked engines.

You should check the rod, cam, crank clearances, as @Denny mentioned.

I've never seen or had any clearance problems with that 68mm bore block with the stock 54mm stroke crankshaft in any 196cc block. But it's always best to check.

I'd rather build the 163cc and 196cc engine jus because there's alot less time spent checking clearances.

As far as the stock rod and cam, I run em 6000 rpm in the 196cc with a pvl or ARC flywheel, 10.5:1CR, timing set 28-30*, a good tuned ruixin stock size carb, stock air box, short header with muffler.
Magnetic oil drain plugs and plenty of oil changes make em last forever.

But I also make sure the clearances are spec'ed for the whole build.

Stock cams works best with stock 10.8 lb springs with a installed height set at .840"-.850".
Dyno Cams makes the best 10.8 springs I've seen so far.

Too much spring will kill the power on the high side, and there's more of a chance to wipe out the lobes and lifters.

You should have plenty of clearance between the piston and valves.

Lay the head upside down, lay a straight edge across it and measure down to the edges of the valves. Find the smallest number.

Subtract the thickness of the straight edge, add the thickness of the head gasket ( you should be using at least a .030" thick gasket since your piston to deck is flush, .00000").

Multiply rocker ratio (stock is less then 1.1:1, but 1.1 is a good number to use) to the cam lift ( stock cams have .224" intake/.231" exhaust).

1.1 x .224 = .2464, that's not even a 1/4".

Subtract that number(.2464") from the head and straightedge number and you will see you have over .100" piston to valve clearance.

Do the exhaust the same way.

Your spark plug ground strap is closer to the piston.

There's other ways to measure it, but it's faster for me this way.

That surely looks like a 14cc head to me. I've used em alot on the 196 and 212's.

Stock 18cc heads are more round like the 20cc and 22cc head.

I'll round up pics for you.

Here's "break in" thread.

I'll find pics later.

Very nice job on that muffler, that looks awesome 👌

Post in thread 'Will this be worth it?' https://www.diygokarts.com/community/threads/will-this-be-worth-it.48132/post-606478
I have 2 engines with different heads. I'm going to focus on the engine with 27mm intake and stock exhaust port. I forget if this is a stock GX200 head and I milled it down or if it's 168F head. I did try milling down a head but I forget if I used it or not. I checked the volume to be about 15CC with a syringe and water. Good news, no leaks. Clearance on the intake port was about 0.260" but the exhaust was only 0.230"ish. Those stock valves are pretty thick and I didn't want to mess with the valve seat so I ground off about 0.030", I attached a pic. I think it's still plenty thick and the sealing face is back from the edge to the valve anyway. The spark plug on this head has an extra washer so clearance should be OK to the plug

While I was at it I measured the second head, 30.5mm intake and 27mm exhaust ports, also about 15 or 16cc but this head was no milled and should be stock 168F (GX160 clone) head. Both intake and exhaust have about 0.260" clearance. I'll put this head aside until the other engine is broken in and working properly.

I had a new flat top piston, I ordered it special because it has 1mm piston rings not the 1.5mm on my other pistons. Is this better? I don't know, but I do know it cost more :ROFLMAO:, but still pretty cheap. Gap was in spec for the top ring (0.25mm, .010") and the second ring had a larger gap than needed I think (0.45mm, 0.018"). I made sure the top oil ring had a gap of about (0.4mm, 0.015") to closely match the second ring. That was the only ring I touched. Head gasket is 0.051" thick so that's about right.

I checked the cam and followers and they seem OK. I didn't have a new cam to use so I put the used one back in. Same for the crank shaft. I did use a new connecting rod and wrist pin. Everything is torqued up to spec. I dont' have a convenient stock carb, but I did jet down the PWK24 to 32 pilot and 90 main and needle all the way down. I'll try that, and if I can't lean it out with the fuel screw, I'll figure out another carb. I don't have a linkage for the stock carb, all my parts/kart is setup for PE22 or PWK24 carbs. I have more jets for the PWK so I put that on. I also reset the timing to stock. I don't use an offset key, I made up a bracket to move the coil. Removed the bracket to get timing back to stock.

I haven't run the engine yet, just needs oil and gas. My oil is 15W40, which is a bit thick but it's what the track runs in all their stock GX200s. I'll order up some 5W30 asap. I'll see if I can get at least the first break in run done this afternoon. I don't have a magnetic drain plug but I'll look for one of those too. Still waiting for the 1 way valves so I'll see how it goes without them.

- Update -
Piston doesn't clear the crank. The wrist pin hole is correct but the piston skirt is too long. I'll have to replace it but cant' until tomorrow. Oh well, can't win them all
 

Attachments

  • 17mm head.jpg
    17mm head.jpg
    815.8 KB · Views: 5
  • 30mm head.jpg
    30mm head.jpg
    1 MB · Views: 6
  • timing bracket.jpg
    timing bracket.jpg
    2 MB · Views: 6
  • engine to test.jpg
    engine to test.jpg
    770.6 KB · Views: 6
Last edited:

BrownStainRacing

Well-known member
Messages
1,366
Reaction score
1,353
I have 2 engines with different heads. I'm going to focus on the engine with 27mm intake and stock exhaust port. I forget if this is a stock GX200 head and I milled it down or if it's 168F head. I did try milling down a head but I forget if I used it or not. I checked the volume to be about 15CC with a syringe and water. Good news, no leaks. Clearance on the intake port was about 0.260" but the exhaust was only 0.230"ish. Those stock valves are pretty thick and I didn't want to mess with the valve seat so I ground off about 0.030", I attached a pic. I think it's still plenty thick and the sealing face is back from the edge to the valve anyway. The spark plug on this head has an extra washer so clearance should be OK to the plug

While I was at it I measured the second head, 30.5mm intake and 27mm exhaust ports, also about 15 or 16cc but this head was no milled and should be stock 168F (GX160 clone) head. Both intake and exhaust have about 0.260" clearance. I'll put this head aside until the other engine is broken in and working properly.

I had a new flat top piston, I ordered it special because it has 1mm piston rings not the 1.5mm on my other pistons. Is this better? I don't know, but I do know it cost more :ROFLMAO:, but still pretty cheap. Gap was in spec for the top ring (0.25mm, .010") and the second ring had a larger gap than needed I think (0.45mm, 0.018"). I made sure the top oil ring had a gap of about (0.4mm, 0.015") to closely match the second ring. That was the only ring I touched. Head gasket is 0.051" thick so that's about right.

I checked the cam and followers and they seem OK. I didn't have a new cam to use so I put the used one back in. Same for the crank shaft. I did use a new connecting rod and wrist pin. Everything is torqued up to spec. I dont' have a convenient stock carb, but I did jet down the PWK24 to 32 pilot and 90 main and needle all the way down. I'll try that, and if I can't lean it out with the fuel screw, I'll figure out another carb. I don't have a linkage for the stock carb, all my parts/kart is setup for PE22 or PWK24 carbs. I have more jets for the PWK so I put that on. I also reset the timing to stock. I don't use an offset key, I made up a bracket to move the coil. Removed the bracket to get timing back to stock.

I haven't run the engine yet, just needs oil and gas. My oil is 15W40, which is a bit thick but it's what the track runs in all their stock GX200s. I'll order up some 5W30 asap. I'll see if I can get at least the first break in run done this afternoon. I don't have a magnetic drain plug but I'll look for one of those too. Still waiting for the 1 way valves so I'll see how it goes without them.

- Update -
Piston doesn't clear the crank. The wrist pin hole is correct but the piston skirt is too long. I'll have to replace it but cant' until tomorrow. Oh well, can't win them all
Jus so we are clear on those check valves.

THEY BOTH GO OUT TO ATMOSHPERE.

NOT 1 in and 1 out.

The last few I got in, didn't have an arrow. Arrow is out. If no arrow jus blow thur it to find OUT.

Heres my grandsons engine, with only 1 check valve. I got it turned down to 4800 max rpm. It easily hits 5300 with the governor working, and throttle stop screw turned out.

The check valve is furthest away from the valve cover, I never see any oil get up to the top where the hose starts going down toward the check valve.

This is a 10.2:1 CR Ducar 212 with a 14cc head on it, I opened it around 15cc to unshroud the valves a lil.
20231231_144842.jpg20231231_144857.jpg


You have a ton of room between the valves and piston.
Remember, both valves are CLOSED when the piston is at tdc.

You should be right at 10.8:1 CR with that .051" head gasket, 15cc head, ft piston at 0" deck height. 👍.

11.1:1 w/ a .045" gasket, MIGHT need better fuel.

11.8:1 w/ a .032" gasket, will definely need 93+ octane to stay on the safe side of things.

That stock cam will really like that 10.8:1, I bet it will get moving pretty quick, 😆 🤣 😂

You can easily and safely run 87-89 octane fuel with 30* ignition timing, 👍.

As far as the ring end gaps, 10 is great for the top, 18 is not so good for the second, but I would run it and see, this way YOU will know what to do next time.

When I start a performance build, I start with at least 3 pistons and 3 sets of rings. Measure and hand pick to get the BEST outta the bunch.

Very rarely will I have to file fit the top ring. Maybe 1 outta 10 builds.
There's no file fit 2nd ring that I'm aware of.

I only order stock pistons with matching rings for the 196 from Dyno Cams. They've been good to me, and the rings always fit the pistons.

I never got into the the ring thickness deal.

That piston hitting the crank is probably made for the gx160 or clone 168f, the both are 163cc and use the same 68mm bore block as does the gx200 and clone 196.

The 163cc engines uses a 45mm stroke crank, thats 9mm shorter then the 196, so the 163 can use a piston with the longer skirt.

The 196 uses the same bore piston, but needs a shorter skirt to clear the bigger counter weights.
Make sense???

I've changed a bunch of 163 to 196, stock 54mm crank, stock rod and piston for a 196,....boom theres an extra 33cc that cost less then $60.

That's a nice bracket for ignition timing changes. 👌

Have you checked to see how many degrees each slot changes????
 

busted_blocks

Active member
Messages
110
Reaction score
96
Location
Dongguan, China
Jus so we are clear on those check valves.

THEY BOTH GO OUT TO ATMOSHPERE.

NOT 1 in and 1 out.

The last few I got in, didn't have an arrow. Arrow is out. If no arrow jus blow thur it to find OUT.

Heres my grandsons engine, with only 1 check valve. I got it turned down to 4800 max rpm. It easily hits 5300 with the governor working, and throttle stop screw turned out.

The check valve is furthest away from the valve cover, I never see any oil get up to the top where the hose starts going down toward the check valve.

This is a 10.2:1 CR Ducar 212 with a 14cc head on it, I opened it around 15cc to unshroud the valves a lil.
View attachment 144450View attachment 144451


You have a ton of room between the valves and piston.
Remember, both valves are CLOSED when the piston is at tdc.

You should be right at 10.8:1 CR with that .051" head gasket, 15cc head, ft piston at 0" deck height. 👍.

11.1:1 w/ a .045" gasket, MIGHT need better fuel.

11.8:1 w/ a .032" gasket, will definely need 93+ octane to stay on the safe side of things.

That stock cam will really like that 10.8:1, I bet it will get moving pretty quick, 😆 🤣 😂

You can easily and safely run 87-89 octane fuel with 30* ignition timing, 👍.

As far as the ring end gaps, 10 is great for the top, 18 is not so good for the second, but I would run it and see, this way YOU will know what to do next time.

When I start a performance build, I start with at least 3 pistons and 3 sets of rings. Measure and hand pick to get the BEST outta the bunch.

Very rarely will I have to file fit the top ring. Maybe 1 outta 10 builds.
There's no file fit 2nd ring that I'm aware of.

I only order stock pistons with matching rings for the 196 from Dyno Cams. They've been good to me, and the rings always fit the pistons.

I never got into the the ring thickness deal.

That piston hitting the crank is probably made for the gx160 or clone 168f, the both are 163cc and use the same 68mm bore block as does the gx200 and clone 196.

The 163cc engines uses a 45mm stroke crank, thats 9mm shorter then the 196, so the 163 can use a piston with the longer skirt.

The 196 uses the same bore piston, but needs a shorter skirt to clear the bigger counter weights.
Make sense???

I've changed a bunch of 163 to 196, stock 54mm crank, stock rod and piston for a 196,....boom theres an extra 33cc that cost less then $60.

That's a nice bracket for ignition timing changes. 👌

Have you checked to see how many degrees each slot changes????
Very good to know the one way valves are both out :ROFLMAO: that might have made a difference. I installed with 1 valve to start with during break-in. I ordered a pressure gauge too.

Yeah my gas is 93+ but I'll leave the compression as it is for now. I buy the 92 and add 5ml/L of octane boost. Probably overkill but I didn't want knocking. I have 2 kinds of flat top pistons, both from the 168F, and one has 1.5mm rings and the other 1mm rings. I clearance the piston skirt and installed the same piston as yesterday. I should have taken a picture. Looked OK. I didn't have another new flat top piston, and it didn't take a lot to clearance the piston skirt. Admittedly it adds another unknown to the already complicated equation but I couldn't help myself if I'm honest.

I assembled the engine and started the break-in. My neighbors aren't really into my breaking in engines at home, sound carries pretty far. I'll finish at the track. However I do have oil leaking out the valve cover a bit, I'm not sure what torque those bolts should be. I seem to always have leakage there. No oil out the breather line out of the valve cover which is good. I put a rag on the end of the breather line so I could see if any oil was blowing out. The exhaust bolts loosened a bit and I have some oil blowing out of somewhere. I attached a pic of my setup and the oil spray on the ground. You can just see the start of the oil drops in the bottom right of the image. I'm pretty sure the engine is on the lean side, I had to adjust the fuel screw to get it to idle without throttle.

Engine starts easily and idles fine though I set to very high idle to not drop much below 2500 rpm. 3500 rpm it seems to skip a bit. Not sure exactly how to describe it, maybe very slight hesitations, maybe carb related. Some rpm's have very high vibrations. My test stand is a hydraulic lift table and it's a terrible stand for this. It resonates and makes a hell of a racket. For today I stood on it which helped but I can't use this regularly. I'll need to make something with isolation legs that I can bolt down.
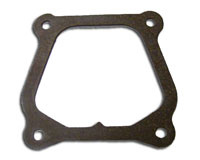
The bracket for the coil has a minimum advance of 7.5 deg (first hole) and then 5 degrees for each hole after that with max being 27.5 deg. It's not my own idea, I saw one similar and drew something up and had it laser cut. It has drawbacks, if you want to have the coil at the same "height" on the flywheel, you have to cut about 1/4" off the mounting posts on the engine. Also if you do go close to 27.5deg you have to hammer a bulge in the cover so you can bolt it on. I do prefer it to a timing key though. I don't need to take off the flywheel to adjust.

If it weren't for the spray I'd say today went very well. With the spray, not sure.

--Update--
I can't think of anywhere the oil could come from besides the head. I took off the head and there is oil on the bottom part of the gasket where the pushrods come through. To me this should be dry so soaked in oil. This head was possibly shaved, the block certainly was shaved, maybe the dowel pins are keeping the head from seating fully? I measured and it's close. I also don't see deformation on the pins but the block/head is aluminum so maybe the pin wouldn't show interference. I ground 1mm off each pin and for sure that isn't an issue now, if it ever was. With the gasket I don't think it was, but better safe than sorry. I added 2 pics. 1 of the gasket and 1 of the head. Doesn't look like a perfect seal. I did "lap" the head and partly the block with granite block and 320 grit. They should be flat enough. I'll try running the engine again this way.
 

Attachments

  • engine test.jpg
    engine test.jpg
    1 MB · Views: 3
  • oil drops.jpg
    oil drops.jpg
    1.4 MB · Views: 3
  • head gasket.jpg
    head gasket.jpg
    2.1 MB · Views: 3
  • head with oil.jpg
    head with oil.jpg
    2.4 MB · Views: 3
Last edited:

busted_blocks

Active member
Messages
110
Reaction score
96
Location
Dongguan, China
I went to the track to run the motor on the stand. No one complains about the noise :). I think the oil "spray" is droplets of oil from the valve cover being blown by the air off the cowl. There is a few drops soaking into the rag on the tube with the one way valve on it, but certainly nothing concerning. I ran the engine 20+ minutes, always at or over 2500rpm and not over 4500rpm. If I run over 3000 rpm the exhaust pipe gets red hot. I didn't run the engine long at higher rpm with the pipe red hot. I'd let it back down to 2500, pipe would cool some and then I'd up the rpms again. Engine sounds more or less OK. I changed the oil after the run and it didn't look bad. Not a ton of metal in it or anything.

Here are some pictures of the exhaust, oil spray and the spark plug after running.
 

Attachments

  • test oil in rag.jpg
    test oil in rag.jpg
    1.7 MB · Views: 4
  • test oil spray.jpg
    test oil spray.jpg
    2.9 MB · Views: 3
  • test plug.png
    test plug.png
    407.4 KB · Views: 3
  • test red pipe.jpg
    test red pipe.jpg
    928.7 KB · Views: 3
  • test setup.jpg
    test setup.jpg
    792 KB · Views: 3
  • test oil drip.png
    test oil drip.png
    775 KB · Views: 4

BrownStainRacing

Well-known member
Messages
1,366
Reaction score
1,353
@busted_blocks

You still got alot going on.
I sure wouldn't be touching that exhaust.

Here's what i would do

Pull the head

Get a flashlight, straight edge, and check the surfaces of the deck and head. Measure the gaps with feeler gauges.

I don't deck blocks and shave heads any more. It makes the push rods too long and now the build needs cut to length push rods to get the rocker arms to set straight.

You can see oil being slung into the valve cover from the hole where the old gov rod was.

I'm not a fan of that, there's more then enough oil coming from the crankcase to valve cover already, unless you have plugged that hole in the block (top right corner), and that's not a very good idea.

You can see for yourself. Pull the valve cover off and start it up, at 2000 rpm idle, you will be covered up with oil in jus a few seconds.

Theres a oil drain back hole down between the lifter bores. DO NOT make that hole bigger then 3/16". I've tried this up to 3/8", and it puts MORE unnecessary oil under the valve cover. The head needs a mist of oil to keep the valve train parts cool......not gallons.

Cut that hose, block the end coming from the block, put a check valve in the 1 coming from the valve cover.

Your exhaust glowing, is a combo of a few things.

CR, ignition timing, air/fuel mix, sparkplug heat range.

1st you need to verify where the ignition timing is at. Having a dial back timing light is easiest, maybe you know some one at the track thats got 1.

If no dial back timing light, then a degree wheel, piston stop, and sharpie pen will work.

You need to find out where you are at, so you know which way you need to go.

And you definitely need more advance, but how much more???? 28-30*, is what I would start with, but need to figure where it's at NOW.

When a high CR engine don't have enough advance ignition timing, it will over heat the top edge of the cylinder, and cause the combustion chamber to over heat, which is why the header is glowing. The block and head can only pull off so much heat, the extra heat gets packed in the header.

I like to use a cold spark plug, ngk bp9es, is a really good plug for high performance engines. Dont kill it with too much fuel, and it won't foul so easy.

I would try it with the same jets and tune you have in the carb now, after I found out where the ignition timing is at.

Stock coils, will pull timing out at higher rpm, causing even higher combustion chamber temps.

I use Dover Power performance coils, they DO NOT pull timing out, set at .065" air gap (coil to flywheel gap) with a PVL flywheel. My buddy uses the cast aluminum flywheel and sets his at .055" air gap.


A tach with cylinder head temp is a tuning tool. It has max rpm recall, temp, and alarms can be set for max rpm and max temp.


Do you have the tin under the cylinder to help cool the engine???? These engines needs both tins to keep air moving in the RIGHT direction.


Rubber valve cover gaskets don't leak, unless they are torqued down to tight and the edge of the gasket surface slices them.


busted_blocks

Active member
Messages
110
Reaction score
96
Location
Dongguan, China
@busted_blocks

You still got alot going on.
I sure wouldn't be touching that exhaust.

Here's what i would do

Pull the head

Get a flashlight, straight edge, and check the surfaces of the deck and head. Measure the gaps with feeler gauges.

I don't deck blocks and shave heads any more. It makes the push rods too long and now the build needs cut to length push rods to get the rocker arms to set straight.

You can see oil being slung into the valve cover from the hole where the old gov rod was.

I'm not a fan of that, there's more then enough oil coming from the crankcase to valve cover already, unless you have plugged that hole in the block (top right corner), and that's not a very good idea.

You can see for yourself. Pull the valve cover off and start it up, at 2000 rpm idle, you will be covered up with oil in jus a few seconds.

Theres a oil drain back hole down between the lifter bores. DO NOT make that hole bigger then 3/16". I've tried this up to 3/8", and it puts MORE unnecessary oil under the valve cover. The head needs a mist of oil to keep the valve train parts cool......not gallons.

Cut that hose, block the end coming from the block, put a check valve in the 1 coming from the valve cover.

Your exhaust glowing, is a combo of a few things.

CR, ignition timing, air/fuel mix, sparkplug heat range.

1st you need to verify where the ignition timing is at. Having a dial back timing light is easiest, maybe you know some one at the track thats got 1.

If no dial back timing light, then a degree wheel, piston stop, and sharpie pen will work.

You need to find out where you are at, so you know which way you need to go.

And you definitely need more advance, but how much more???? 28-30*, is what I would start with, but need to figure where it's at NOW.

When a high CR engine don't have enough advance ignition timing, it will over heat the top edge of the cylinder, and cause the combustion chamber to over heat, which is why the header is glowing. The block and head can only pull off so much heat, the extra heat gets packed in the header.

I like to use a cold spark plug, ngk bp9es, is a really good plug for high performance engines. Dont kill it with too much fuel, and it won't foul so easy.

I would try it with the same jets and tune you have in the carb now, after I found out where the ignition timing is at.

Stock coils, will pull timing out at higher rpm, causing even higher combustion chamber temps.

I use Dover Power performance coils, they DO NOT pull timing out, set at .065" air gap (coil to flywheel gap) with a PVL flywheel. My buddy uses the cast aluminum flywheel and sets his at .055" air gap.


A tach with cylinder head temp is a tuning tool. It has max rpm recall, temp, and alarms can be set for max rpm and max temp.


Do you have the tin under the cylinder to help cool the engine???? These engines needs both tins to keep air moving in the RIGHT direction.


Rubber valve cover gaskets don't leak, unless they are torqued down to tight and the edge of the gasket surface slices them.

I have measured the gap in the head flatness and it's undetectable. I lapped it flat. The bore has maybe .0005", if that, out of flat in the center from decking. I lapped it in partially but gave up as its pretty close.

I'm not going to be shaving any blocks or heads anymore. I shaved 0.030" but I could have just gotten a 0.020" longer connecting rod. Combine that with stock GX160 head + thinner gasket and flat top piston and I think you an get just about any high compression value you want.

I have a pressure gauge that will fill the old governor hole, for now I can just block it. I was trying to equalize crank case pressure, but I get that might not be the best way. I do have a large hose off the valve cover with check valve, but I can add a second.

I have a tack and heat camera, I'll try and make due with those. I'd ideally like a go-kart computer to log this stuff, but it's not in the budget currently.

My flywheel is cast aluminum off another Honda small engine. Listed as GXV160. When I look up the stock timing for that, I found it listed at 20deg. Which is the same as I see listed for the GX200. With my bracket, I can add 7.5deg (or 12.5, 17.5 etc.) to that, or make a new bracket I guess. So currently 20deg, but can do 27.5deg with my bracket.

That's coil seems like a good deal. It's unfortunately can be very difficult to order from abroad here.

I do not have the stock shield on the head. I will put that back.

My gaskets for the valve cover seem to always leak no matter what torque I use. They either don't seal, or they get cut by too much pressure. I think I have a sheet of silicone rubber I can cut a gasket from. That should prevent the cutting problem. It's complicated here to get parts. Some things are easy to get and cheap, others are hard to find in good quality. I have issues finding crank shafts. The common ones have sintered cam gear which is not as hard as the steel gear found on most good cranks. The crank shafts themselves are good but the cam gear is cheap. I don 't have a lot of testing on these but the it seems to me those gears would wear quickly, but that's a problem for another day.

1. Check the stock timing (I think this one is known now)
2. Put the heat shields on
3. Replace the spark plug with colder one (3 days to get that specific plug)
4. Replace gasket for the valve cover with silicone or rubber

2 & 4 I can do today, and I'll assume the timing is 20deg + add another 7.5deg. I'll also see if I can print a degree wheel and check the timing that way to verify it is in fact 20deg stock.

I'll see what i can get done today, thanks again
 

BrownStainRacing

Well-known member
Messages
1,366
Reaction score
1,353
I have measured the gap in the head flatness and it's undetectable. I lapped it flat. The bore has maybe .0005", if that, out of flat in the center from decking. I lapped it in partially but gave up as its pretty close.

I'm not going to be shaving any blocks or heads anymore. I shaved 0.030" but I could have just gotten a 0.020" longer connecting rod. Combine that with stock GX160 head + thinner gasket and flat top piston and I think you an get just about any high compression value you want.

I have a pressure gauge that will fill the old governor hole, for now I can just block it. I was trying to equalize crank case pressure, but I get that might not be the best way. I do have a large hose off the valve cover with check valve, but I can add a second.

I have a tack and heat camera, I'll try and make due with those. I'd ideally like a go-kart computer to log this stuff, but it's not in the budget currently.

My flywheel is cast aluminum off another Honda small engine. Listed as GXV160. When I look up the stock timing for that, I found it listed at 20deg. Which is the same as I see listed for the GX200. With my bracket, I can add 7.5deg (or 12.5, 17.5 etc.) to that, or make a new bracket I guess. So currently 20deg, but can do 27.5deg with my bracket.

That's coil seems like a good deal. It's unfortunately can be very difficult to order from abroad here.

I do not have the stock shield on the head. I will put that back.

My gaskets for the valve cover seem to always leak no matter what torque I use. They either don't seal, or they get cut by too much pressure. I think I have a sheet of silicone rubber I can cut a gasket from. That should prevent the cutting problem. It's complicated here to get parts. Some things are easy to get and cheap, others are hard to find in good quality. I have issues finding crank shafts. The common ones have sintered cam gear which is not as hard as the steel gear found on most good cranks. The crank shafts themselves are good but the cam gear is cheap. I don 't have a lot of testing on these but the it seems to me those gears would wear quickly, but that's a problem for another day.

1. Check the stock timing (I think this one is known now)
2. Put the heat shields on
3. Replace the spark plug with colder one (3 days to get that specific plug)
4. Replace gasket for the valve cover with silicone or rubber

2 & 4 I can do today, and I'll assume the timing is 20deg + add another 7.5deg. I'll also see if I can print a degree wheel and check the timing that way to verify it is in fact 20deg stock.

I'll see what i can get done today, thanks again
That sounds nice and flat to me, I've definitely had and seen worse then .0005".

Yea, that long rod will save a man alot of money and time. It took me 3 or 4 builds to figure that out, 😆 🤣 😂 😹 😆

What I'm seeing with the timing deal is NOT the flywheels are wrong, its the key way being off on the crank.

Take 10 cranks and a stock key and PVL or ARC flywheel and you will have 10 different numbers. Being checked with a dial back timing light, piston stop or dial indicator, as long as they are checked the same way by the same person.

I've seen new cranks come outta the box 18-27* with a stock key.

Heres the last 1 I checked. Ducar 224 with a PVL flywheel.
The PVL flywheel has +4* advance with a stock key.

I came up with 26*, it should have been 28*. So the crank only had 22* to start with. No big deal for me, I've since moved it to 29* without a key.

If I had used a ARC it would have been 30*, since ARC has +8* advance built into most of theirs, the ones I use from them are always +8*

PVL and ARC has a line on them, they are easy to find out what * the timing will be.

20230928_193355.jpg

20230928_193316.jpg

I think ouuta all these cranks I have ever set ignition timing on (100+), they have maybe been 5 that actually was 24* from the factory.

Like that cast flywheel in your other thread, Ive installed and set 6, I think, maybe 5, they've been 15-20*. That's close to 18, and that's close to 20, but to me.....it's all wrong and can throw off a good tune.

That's why I say to find out where it's at NOW with a stock key, then you can fine tune it in with your bracket, 👍.

Then when you get another crank, you have to do it again, 😆 🤣 😂 😹 😆 the fun never stops, right???
 
Top